
Start Presenting with Demo Time
Once you have created your play, you can start presenting it using Demo Time. Demo Time provides a presentation mode which allows you to use a keyboard shortcut or a presenter/clicker to navigate through your acts/scenes without having to click through each step manually.
Start presenting
Once you have created your acts and scenes, you will see them in the Demo Time panel view. You can run them by clicking on each demo manually. However, to present them more effectively, you can use the presentation mode. In this mode, you can navigate through your acts and scenes using a keyboard shortcut or a presenter/clicker.
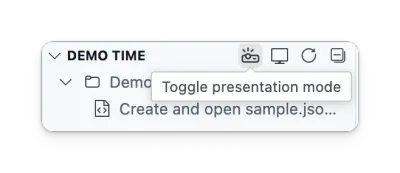
To enter presentation mode, click the “projector” icon in the Demo Time panel view or use the Demo Time: Start Presentation Mode command from the command palette.
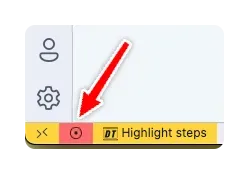
Once you are in presentation mode, you will see a record icon in the status bar indicating that you are in presentation mode.
You can now use your right arrow key →, PageDown, or the right presenter/clicker button to navigate through the steps of your acts and scenes. On slides, this also reveals the click steps one by one.
Next scene button
While you present, the status bar shows a button with the title of the next scene. Click it to run that scene. Hover over it to see the description of the scene.
As scene titles differ in length, the button changes width with every scene, which moves the other status bar items. To show the same text for every scene, set the demoTime.nextSceneButtonText setting:
{ "demoTime.nextSceneButtonText": "Next"}You can use codicons in the text, like $(arrow-right) Next. The tooltip still shows the next scene, and the presenter view still shows its title. Leave the setting empty to show the title of the next scene again.
Customize what gets hidden
When you toggle presentation view, Demo Time hides a few VS Code UI areas so you can focus on presenting. You can choose exactly which areas to hide via the demoTime.presentationViewToggles setting. Allowed values: statusBar, tabs, activityBar, sideBar, secondarySideBar (where VS Code shows Chat), panel.
{ "demoTime.presentationViewToggles": [ "statusBar", "tabs", "activityBar", "sideBar", "secondarySideBar", "panel" ]}To keep the status bar and panel visible, for example:
{ "demoTime.presentationViewToggles": ["tabs", "activityBar", "sideBar"]}Stop presenting
If you want to stop presenting, you can click on the record icon in the status bar, or use the Demo Time: Toggle presentation mode command from the command palette. This will stop the presentation mode and return you to the normal Demo Time view.
Both of these actions will keep the current demo progress and allow you to continue from where you left off when you start the presentation mode again.
Reset the demo progress
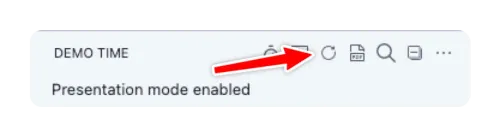
In case you want to start from the beginning, you can use the reset action from the Demo Time panel view or use the Demo Time: Reset command from the command palette. This will reset the demo progress and allow you to start from the beginning.
Enable “Go Back” Navigation
If you would like to enable the ability to go back to the previous step, you can enable this by updating the demoTime.previousEnabled setting to true.
{ "demoTime.previousEnabled": true}When you enabled this setting, you can use your left arrow key, PageUp, or the left presenter/clicker button to navigate back to the previous step.
Tips for presenting
- Test with timing: Practice your script while talking through each step
- Use
presentation mode: Avoid clicking through steps mid-talk - Keep the demo focused: Add extra info in notes, not in live code
- Backup plan: Keep your scenes self-contained so you can restart easily for when you would add manual changes