
Present your slides
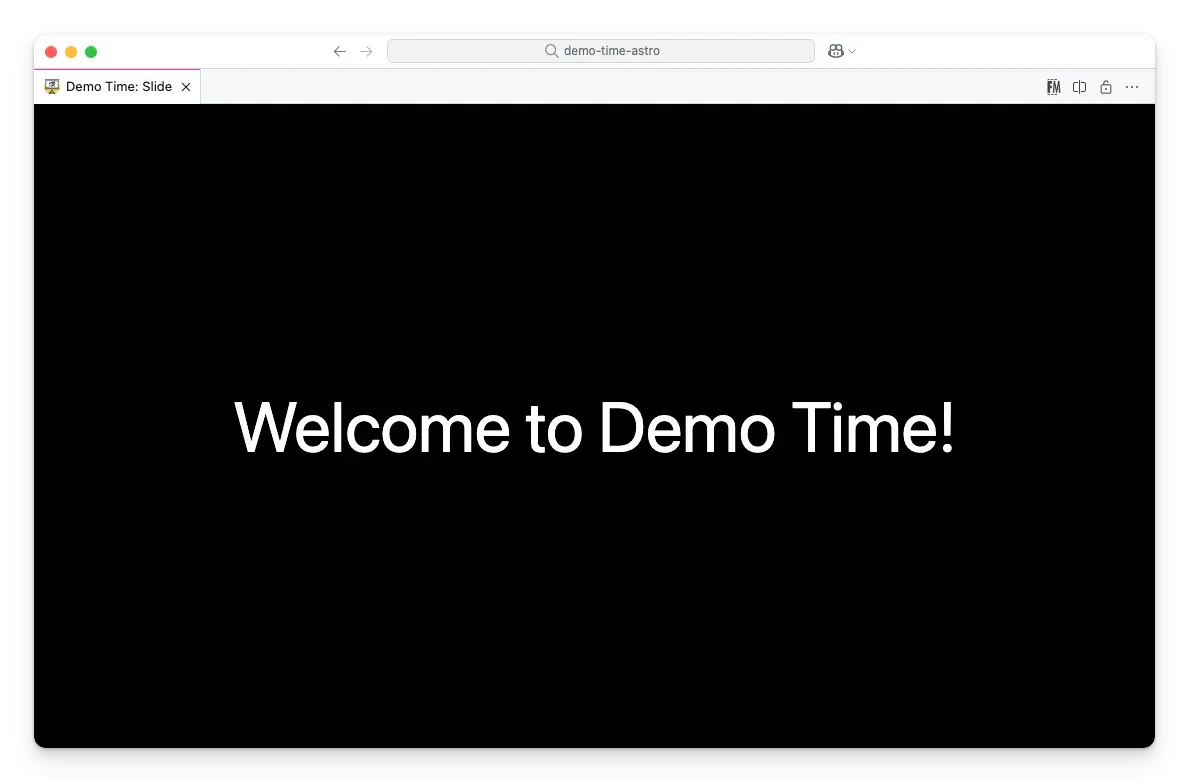
Demo Time is more than just a tool for live demos, it also lets you present slides seamlessly within your editor. With Markdown-based slides, you can deliver presentations without switching between different applications, ensuring a smooth transition between your slides and demos.
Creating slides
To create slides, start by creating a new Markdown file and adding your content:
---theme: default---
# Title
Hello, **Demo Time**!
You can also create multiple slides within the same Markdown file by separating them with three hyphens (---). This is useful for grouping related slides together. For example:
---theme: default---
# Slide 1 Title
Content for the first slide.
---
# Slide 2 Title
Content for the second slide.
To give a slide its own front matter, put it directly after the --- separator and close it with another ---:
# Slide 1 Title
---layout: section---
# Slide 2 Title
The block is only used as front matter when it is valid YAML with key: value properties. Otherwise, the --- is a plain separator, so a slide can start with a line like Note: remember this. A --- inside a code block (fenced with ``` or ~~~) does not start a new slide.
Front matter for all slides
The front matter at the top of the file is the document front matter. It belongs to the first slide, and the other slides in the file inherit from it:
themeandcustomThemeapply to every slide. When the document front matter sets them, a slide can’t use another value.transition,header,footer,backgroundandclassapply to every slide that doesn’t set its own value.- Any other property, like the properties you use in a custom layout, applies to every slide that doesn’t set its own value.
layout,customLayout,image,autoAdvanceAfterandhideonly apply to the first slide.
The front matter reference shows this for every property.
---theme: frosttransition: fadeIn---
# Slide 1 Title
---transition: slideLeft---
# Slide 2 Title
Both slides use the frost theme. The first slide uses the fadeIn transition, the second slide its own slideLeft transition.
Slide settings
You can customize your slides using the following properties in the front matter:
theme- Specify the theme for the slide.layout- Choose a layout for the slide.transition- Set the transition effect for the slide.image- Set a background image for the slide.background- Set a colour, gradient or image as the background of the slide. See slide background and classes.class- Add CSS classes to the slide, so a custom theme can style it. See slide background and classes.video- Set a video for the slide (works with video layout or custom layouts).customTheme- Provide a custom CSS file for the slide.customLayout- Specify a custom layout for the slide.autoAdvanceAfter- Automatically advance to the next slide or demo after a specified number of seconds.hide- Skip the slide while presenting. See hiding slides.autoFit- Scale the content down when it doesn’t fit on the slide. See content that doesn’t fit.progress- Show (true,top,bottom) or hide (false) the progress bar on the slide.
The front matter reference lists every property with its values and default, including the properties of the video and animated SVG layouts. In the editor, Demo Time suggests the properties and their values while you type, and shows their description when you hover over them.
Themes
Personalization matters! Demo Time allows you to customize the look and feel of your slides by selecting a built-in theme or creating your own.
To change your slide theme, you can specify a different theme in the slide configuration with the theme property or provide a custom CSS file in the demo JSON file.
Layouts
Demo Time supports various slide layouts, with the layout property, to help structure your presentation effectively:
default- A standard slide layoutintro- Ideal for opening slidesquote- Perfect for displaying key takeaways or citations- … (more layouts available)
Transitions
Transitions add a dynamic touch to your slides. You can specify the transition effect for your slides using the transition property. Demo Time supports various transitions, including:
fadeInslideRightslideLeftslideUpslideDownzoomInzoomOutrotateInrotateOut
Slide background and classes
To change the look of one slide, you don’t need a custom layout or a theme of its own. Use the background and class front matter properties.
background sets the background of the slide. It can be:
- a CSS colour, like
"#1e3a8a",navyorrgb(30 58 138); - a CSS gradient, like
linear-gradient(135deg, #1e3a8a, #9333ea); - the path (relative to the workspace folder) or URL of an image, like
.demo/assets/bg.png. The image covers the slide.
---layout: sectionbackground: "linear-gradient(135deg, #1e3a8a, #9333ea)"---
# Part 2: the demoA value is used as an image when it starts with http://, https://, /, ./ or ../, or ends with an image extension like .png, .jpg, .svg or .webp. Any other value is used as the CSS background, so a url() in it is not resolved against the workspace folder.
When a slide sets both, the image property takes precedence on layouts that show it as the background. On the image-left and image-right layouts, the image is shown next to the content, and the background is the background of the whole slide.
class adds one or more CSS classes, separated by spaces, to the .slide__layout element of the slide, next to the layout and transition classes. Style them in a custom theme:
---class: section-break dark---
# Questions?
The background property of a slide, also one it gets from the document front matter, takes precedence over a background that a class sets in your theme. Add !important to the background of the class to use it on those slides.
Both properties also apply in the Go to slide overview, the PDF export and the next slide preview of the presenter view. In the document front matter, they apply to every slide in the file that doesn’t set its own value, so you can give a whole deck the same background.
Slide preview
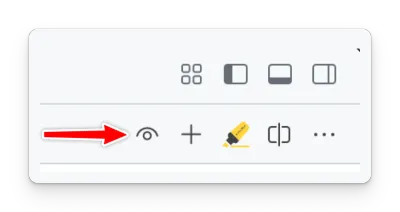
When you create a slide, you can preview it by running the Demo Time: Open slide preview command or by clicking on the open preview (eye) action from the editor title bar.
Sync the preview with the editor
While you write your slides, the slide preview follows the cursor in the markdown editor:
- Editor to preview: when the preview shows the file of the active editor, moving the cursor to another slide shows that slide in the preview.
Demo Time: Open slide previewopens the preview at the slide under the cursor. Typing in a slide doesn’t move the preview away from a slide you navigated to; clicking in the editor does. - Preview to editor: double-click the slide, or select Reveal slide source in the More actions (
…) menu of the slide controls, to move the cursor to the source of the slide. When the file isn’t open in a visible editor, it opens next to the preview.
The sync never applies in presentation mode, so moving the cursor can’t change slides during a talk. To turn it off, set demoTime.slidePreviewSync to false. Reveal slide source keeps working when the sync is off.
Presenting slides
To incorporate slides into your workflow, add them as moves in your scene script or configuration files. This ensures you can control when and where your slides appear during the presentation.
Use the openSlide action to open a slide in the slide view.
{ "action": "openSlide", "path": "<relative path to the file>", "slide": "<slide index you want to open (1-based) (optional)>"}action: openSlidepath: <relative path to the file>slide: <slide index you want to open (1-based) (optional)>With this approach, you can seamlessly integrate slides into your demos, making your presentations more engaging and dynamic.
Slide controls
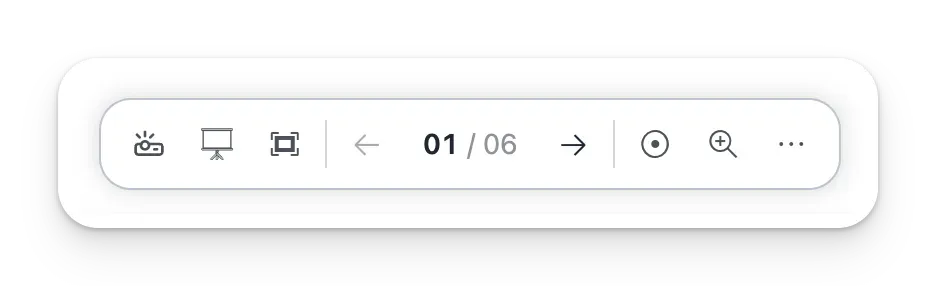
When previewing or presenting slides, a compact control bar appears at the bottom of the slide. It is organized into three sections — view tools, slide navigation, and slide tools — and tucks the less-common actions into a More actions (…) menu so the bar stays uncluttered and adapts to narrow windows.
View tools
- Toggle presentation mode: Toggles presentation mode, which allows you to use your clicker or keyboard to navigate through your slides. The button is highlighted while presentation mode is active.
- Toggle presentation view: Toggles the presentation view, which hides VS Code UI areas (status bar, tabs, activity bar, …) for a distraction-free experience. You can also use the
setPresentationViewandunsetPresentationViewactions, or theDemo Time: Toggle presentation view (hides status bar, tabs, and activity bar)command. - Toggle fullscreen: Toggles Visual Studio Code’s fullscreen mode.
Slide navigation
- Previous: Triggers the previous move (only if the
demo-time.previousEnabledsetting is enabled or when using grouped slides). - Slide counter: Shows the current slide and total (for example
01 / 05). When slide thumbnails are available, selecting it opens the Go to slide overview so you can jump straight to any slide. Hidden slides are dimmed in the overview, but you can still open them. Slides with content that doesn’t fit get a warning icon. - Next: Triggers the next move.
Slide tools
- Toggle laser pointer: Toggles the laser pointer to highlight specific areas on your slides. The button is highlighted while the laser pointer is active.
- Toggle zoom: Toggles the zoom feature to zoom in on parts of your slides. The button is highlighted while zoom is active. Press
Escapeto leave zoom; this does not turn off presentation view. - More actions (
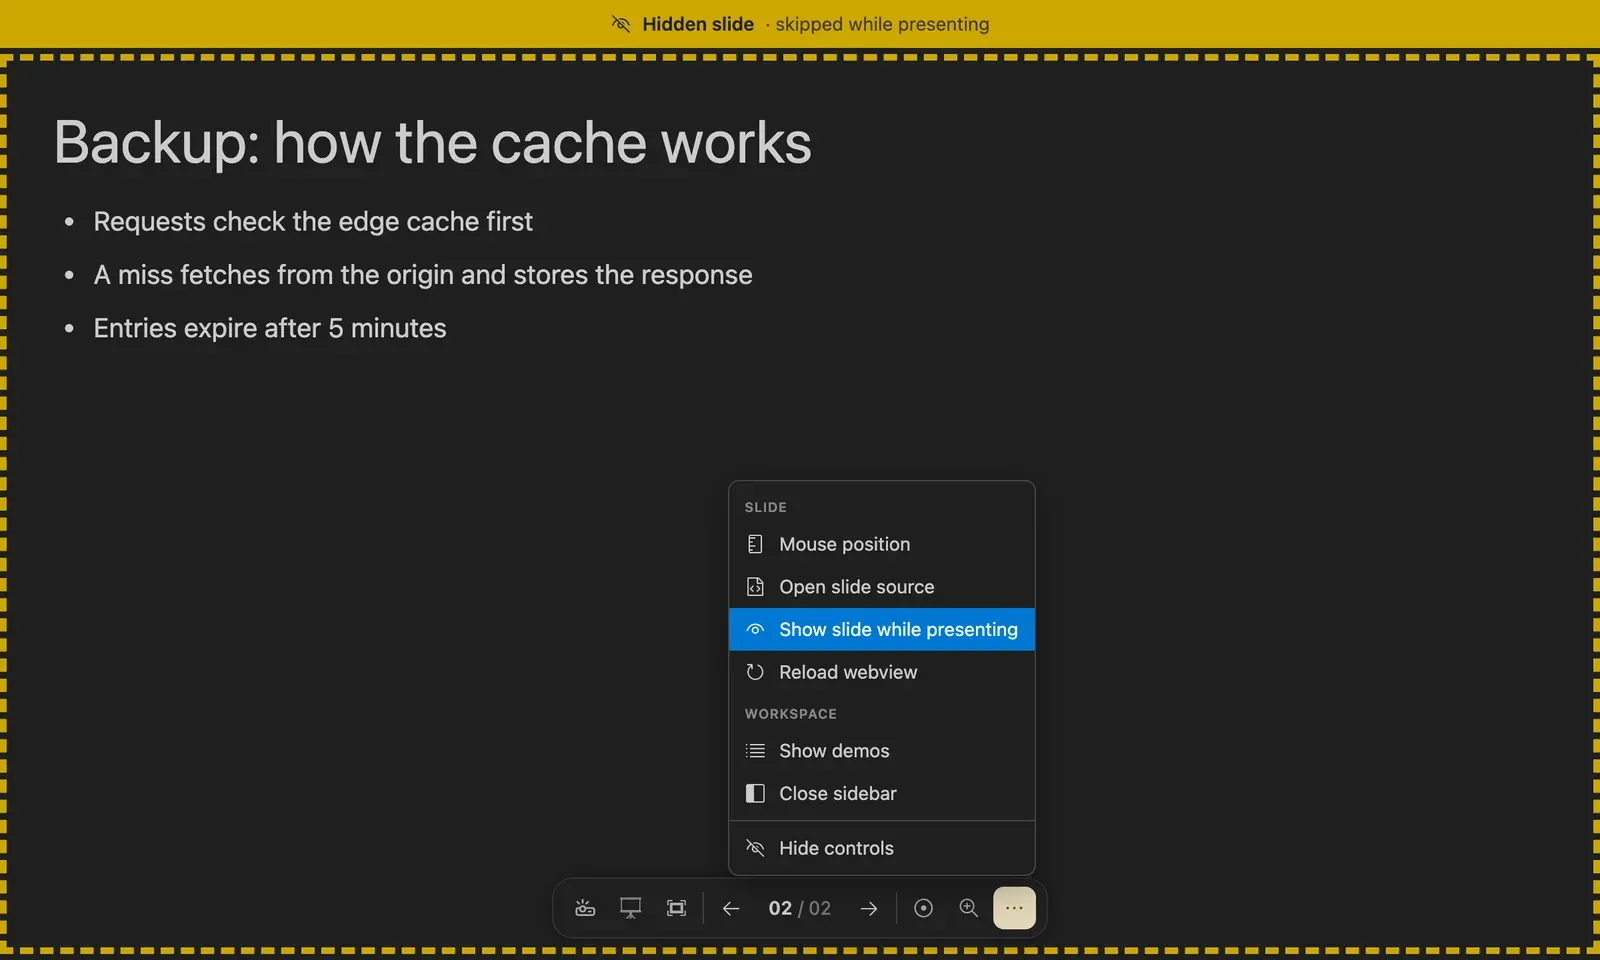
…): Opens a menu with the remaining actions, grouped for discoverability:- Slide (only available when you are not in presentation mode)
- Mouse position: Toggles the mouse position overlay on the slide, which can be useful to position elements on your slides.
- Reveal slide source: Opens the source file of the slide in the editor, with the cursor on the current slide, so you can edit it directly. You can also double-click the slide. See sync the preview with the editor.
- Hide slide while presenting / Show slide while presenting: Adds or removes
hide: truein the front matter of the current slide. See hiding slides. - Add speaker notes / Edit speaker notes: Opens an editor for the notes of the current slide, and saves them in its
<!-- notes -->block. See notes in your slides.
- Workspace
- Show demos: Opens the Demo Time panel to access your demos and slides.
- Close sidebar: Closes the side bar to provide more space for your slides.
- Hide controls: Hides the slide controls and mouse, allowing you to focus on your presentation without distractions.
- Slide (only available when you are not in presentation mode)
Auto-advancing to the next slide
You can enable auto-advancing to the next slide after a specified duration by using the autoAdvanceAfter property in your slide configuration.
---layout: defaultautoAdvanceAfter: 3---
# Going to the next slide in 3 seconds
------
# End of the demo
When the slide has click steps, each interval reveals one step, and the slide moves on after the last step.
Hiding slides
Add hide: true to the front matter of a slide to keep it in the file without presenting it. This is useful for backup slides for questions, an alternative ending, a slide for the long version of your talk, or a draft.
# Thank you!
---hide: true---
# Backup: how the cache works
While presentation mode is on, a hidden slide is:
- skipped when you go to the next or previous slide, including auto-advancing with
autoAdvanceAfter; - skipped by the next slide preview in the presenter view;
- not counted by the
{{crntSlideIdx}}and{{totalSlides}}header and footer placeholders and the progress bar.
When an openSlide move opens a hidden slide, the slide view continues with the next visible slide.
Hidden slides are still in the Go to slide overview of the slide controls, dimmed and with an eye icon. Open one from there to show it during your talk, for instance to answer a question.
Outside presentation mode, the slide preview still shows hidden slides so you can navigate to them and edit them. A hidden slide gets a dashed frame, and a Hidden slide bar above it.
To hide or show the current slide from the slide preview, open the More actions (…) menu of the slide controls and select Hide slide while presenting or Show slide while presenting. This adds or removes hide: true in the front matter of the slide and saves the file.
Content that doesn’t fit
A slide is 960×540 pixels. When a slide has too much content, like a long code block or one bullet too many, the part that doesn’t fit is cut off. How much fits depends on the theme and the fonts, so Demo Time measures the rendered slides in the slide preview and warns you:
- The slide preview shows a Content doesn’t fit the slide badge on a slide that doesn’t fit, with how much it is too tall or too wide, like 84px too tall. A frame marks the edges of the slide, so you can see where it ends when the slide has the same background as the preview, and a striped band with a label like ↓ 84px cut off marks every edge where content is cut off. The badge and the marks are only shown outside presentation mode.
- While the preview is open, it measures every slide of the file in the background, with all its click steps revealed. The slides that don’t fit get a warning in the Problems panel, on the first line of the slide, and a warning icon in the Go to slide overview of the slide controls. The warnings update when you save the file.
Content counts as overflowing when it reaches past the edges of the slide. Elements with position: absolute or position: fixed, like decorations in a custom layout, are left out, and content inside an element that scrolls or clips its content counts up to the edges of that element.
The best fix is to remove content or to split the slide in two. When that isn’t an option, add autoFit: true to the front matter of the slide:
---autoFit: true---
# The full configuration
...
With autoFit, the content of a slide that doesn’t fit is scaled down until it fits, keeping the padding of the layout, to at most 50% of its size. The text wraps at the smaller size, so a long line can take less room. Slides that fit keep their size. Outside presentation mode, a Scaled to 85% by autoFit badge shows how much the content of the current slide was scaled down. When the content doesn’t fit at 50% either, you still get the warning, which tells you that autoFit is on and how much is left.
autoFit also applies in presentation mode, the Go to slide overview, the PDF export and the next slide preview of the presenter view. In the document front matter, it applies to every slide in the file that doesn’t set its own value.
Problems in slide files
Demo Time checks the front matter of your slide files while you edit them, and reports the problems in the Problems panel. It checks the markdown files in the .demo folder, and the files that an openSlide move opens.
| Problem | Example | Severity |
|---|---|---|
| Invalid YAML in a front matter block, at the line of the error. The slide shows these lines as content. | theme: frost: dark | Error |
| A misspelled property, with a did you mean suggestion | transtion: fadeIn | Warning |
| A property that Demo Time doesn’t use, and that no custom layout, header or footer template reads | speaker: Jane | Information |
An invalid value for layout, theme, transition, controlsPosition or progress, or a value that isn’t true/false or a number for a property that expects one | layout: two-column | Warning |
A file that doesn’t exist for image, video, svgFile, customTheme or customLayout, or for a background image. Paths are relative to the workspace folder, the same way the slide preview loads them. http(s) URLs are not checked. | image: .demo/assets/missing.png | Warning, or Error for customLayout |
A custom layout, or an inline header or footer template, with invalid Handlebars | {{#if title}} without {{/if}} | Error |
A --- followed by a line like Note: text (a capitalized word and a colon), which makes the lines up to the next --- the front matter of the slide instead of its content | Note: remember this | Warning |
Properties that are only meant for your own templates don’t get a problem as long as a custom layout, the header or footer of the slide, or the demoTime.slideHeaderTemplate and demoTime.slideFooterTemplate templates use them.
The problems update when you change the slide file, and when you add or remove a file that the slides refer to, like an image or a layout.
Header and Footer
Learn how to add and customize headers and footers in your slides for branding, context, or additional information, like the slide number, the act and scene title, or the date. You can also show a progress bar on your slides. See the Header and Footer documentation for details and examples.
Notes
Add speaker notes to a slide with a <!-- notes block in the slide markdown. The block is not shown on the slide, but in the presenter view and the remote control:
# Why Demo Time
<!-- notesMention the conference from last year.-->
You can also add the notes from the More actions (…) menu of the slide controls. Check the notes section of the documentation for all the details, and for notes on the scene level.